Adventures in frame making

Forum rules
The GPU sub-forum is for discussion on mining as it pertains to GPU's specifically. This can include topics such as the best hardware to purchase, the best software to use with a GPU, recommendations on mining racks or cabinets, cooling systems, how to move from CPU to GPU mining, etc.

For the full list of PROHASHING forums rules, please visit https://prohashing.com/help/prohashing- ... rms-forums.
Post Reply
User avatar
TechElucidation
Posts: 44
Joined: Fri Mar 18, 2022 2:01 pm

Adventures in frame making

Post by TechElucidation » Sat Apr 23, 2022 12:01 am

While doing some research on mining efficiency (power in my area is $0.19/Kwh) I was reading about one of the benefits of reducing power usage, was lower temps, which mean my GPUs would last longer. So I look at quick look at my rig, and honestly I don’t push it too hard right now, with all my temps normally under 70 - 75.

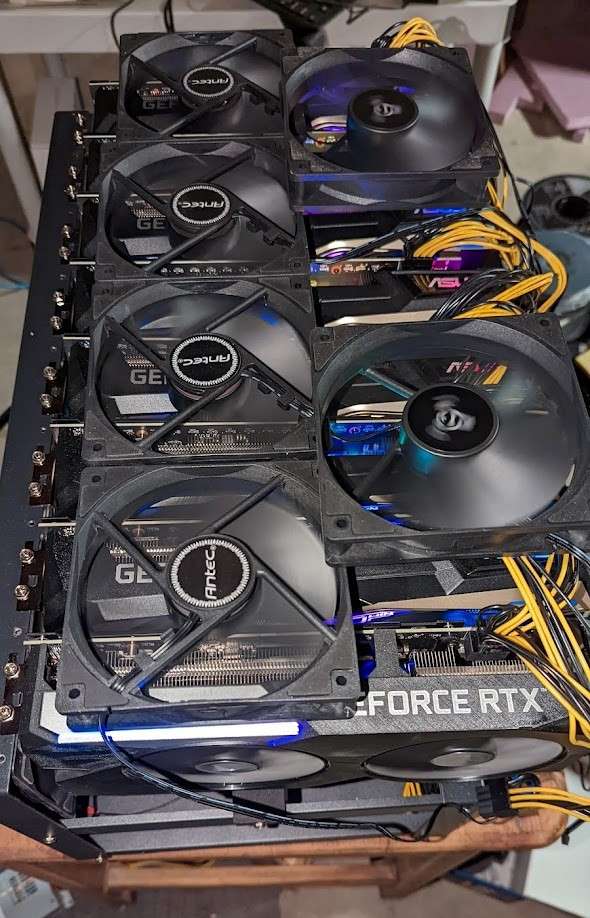
Looking at my current rig it was a pretty standard 8-card rig open air rig. But it got me thinking about the design, as there are four large fans at the “face” of the GPUs. However looking closely at my GPUs (ASUS 3060 TI KO V2’s) the fins of the heat sink were arranged along the short “top to bottom” arrangement.

Image

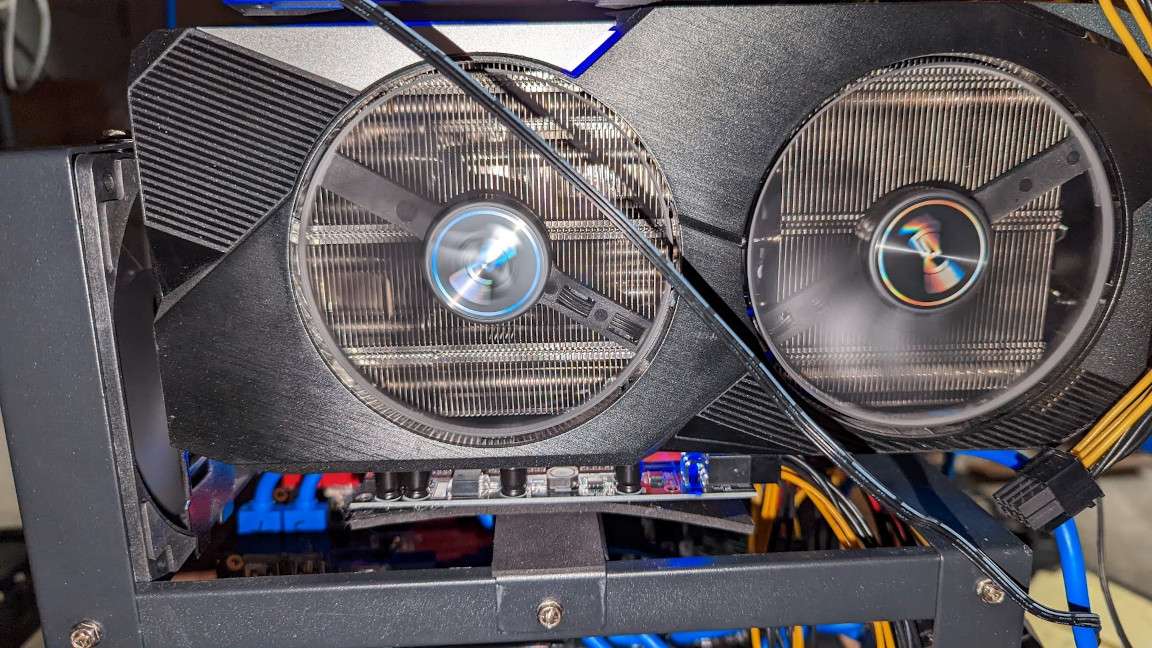
So in this arrangement the fan at the face would just be pushing air against the first fin face and not “through” the card. This is not always the case with every card, on an AMD card and a 1650 I have they are “front to back”, so the fan placement would allow for the air to flow all the way through from the face fans.

Image

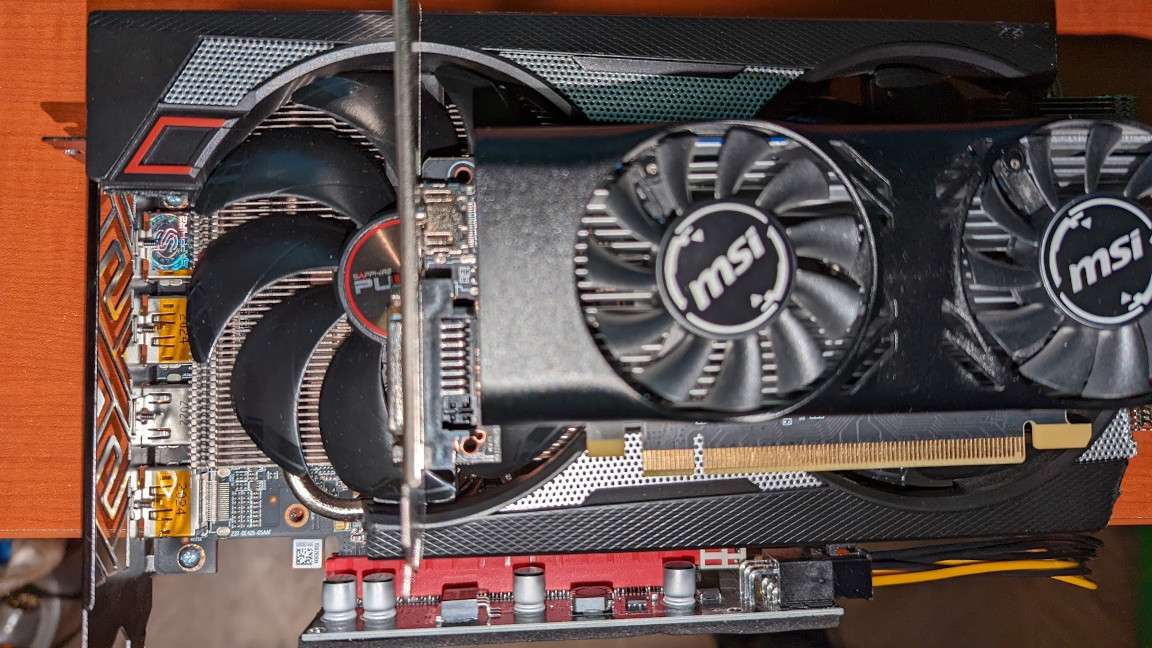
So my first change was simply to move the fans from the face, and just lay them on the top of the cards, and this dropped all the temps quite a bit, and they were running around the low 60’s.

Image

As a tip to people out there with rigs, check your cards, and fan placement, and make sure the air is really flowing along the fins, not against them. Perhaps this is obvious, but I really had not even thought about it till then.

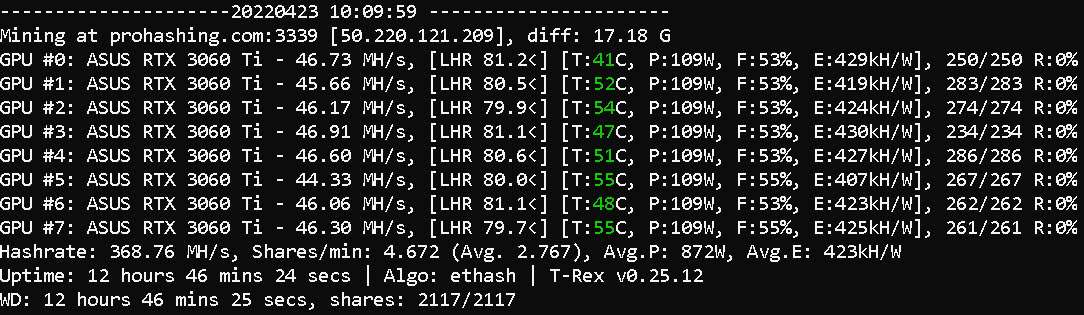
But one thing caught my eye with this, one card was only 39, and only had a fan of 50%. The others were all in the 60 range, with rans running between 60% and 80%. This was not an anomaly, looking at the numbers over a few days after the change, that one card was always much lower than the rest.

After looking at the rig, and doing some tests to confirm, it was obvious that the coolest one was the one at the end, where the stock fans could easily push the air out to the open. The others all get some back-pressure from trying to blow into the card beside them.

Image

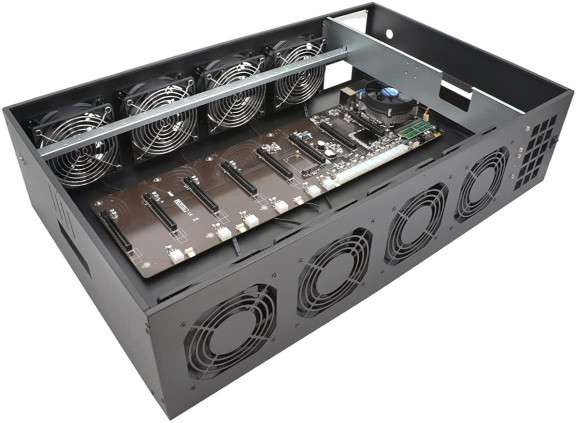
So, I started looking for better options for the mining rig. One thing I kind of liked was the “server rack” style. An enclosed case (reduce dust) with fans that pull the air across the cards. However, in my opinion this had a similar issue with the air flow trying to be along the length, which was not the best for these cards.

Image

So looking at other options, they were all efforts to spread the cards out more. Either by going wider, or trying to go to two tiers.

Image

Image

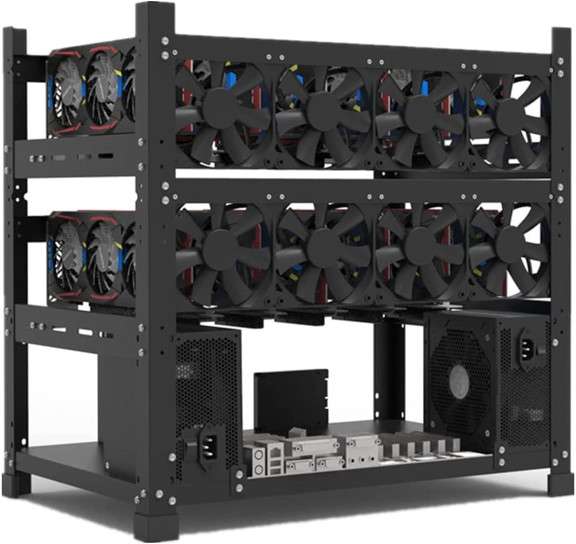
These would be better, but you would still get some back pressure, the fans were still in the wrong place, and these get EXPENSIVE. Also, if I was going to change the rig I wanted to increase my capacity to handle 12 GPUs, in which case I would back to a similar density as my current situation.

So that is when I decided to do the only rational thing somebody with questionable reasoning skills could come up with… spend more on building my own crazy contraption!

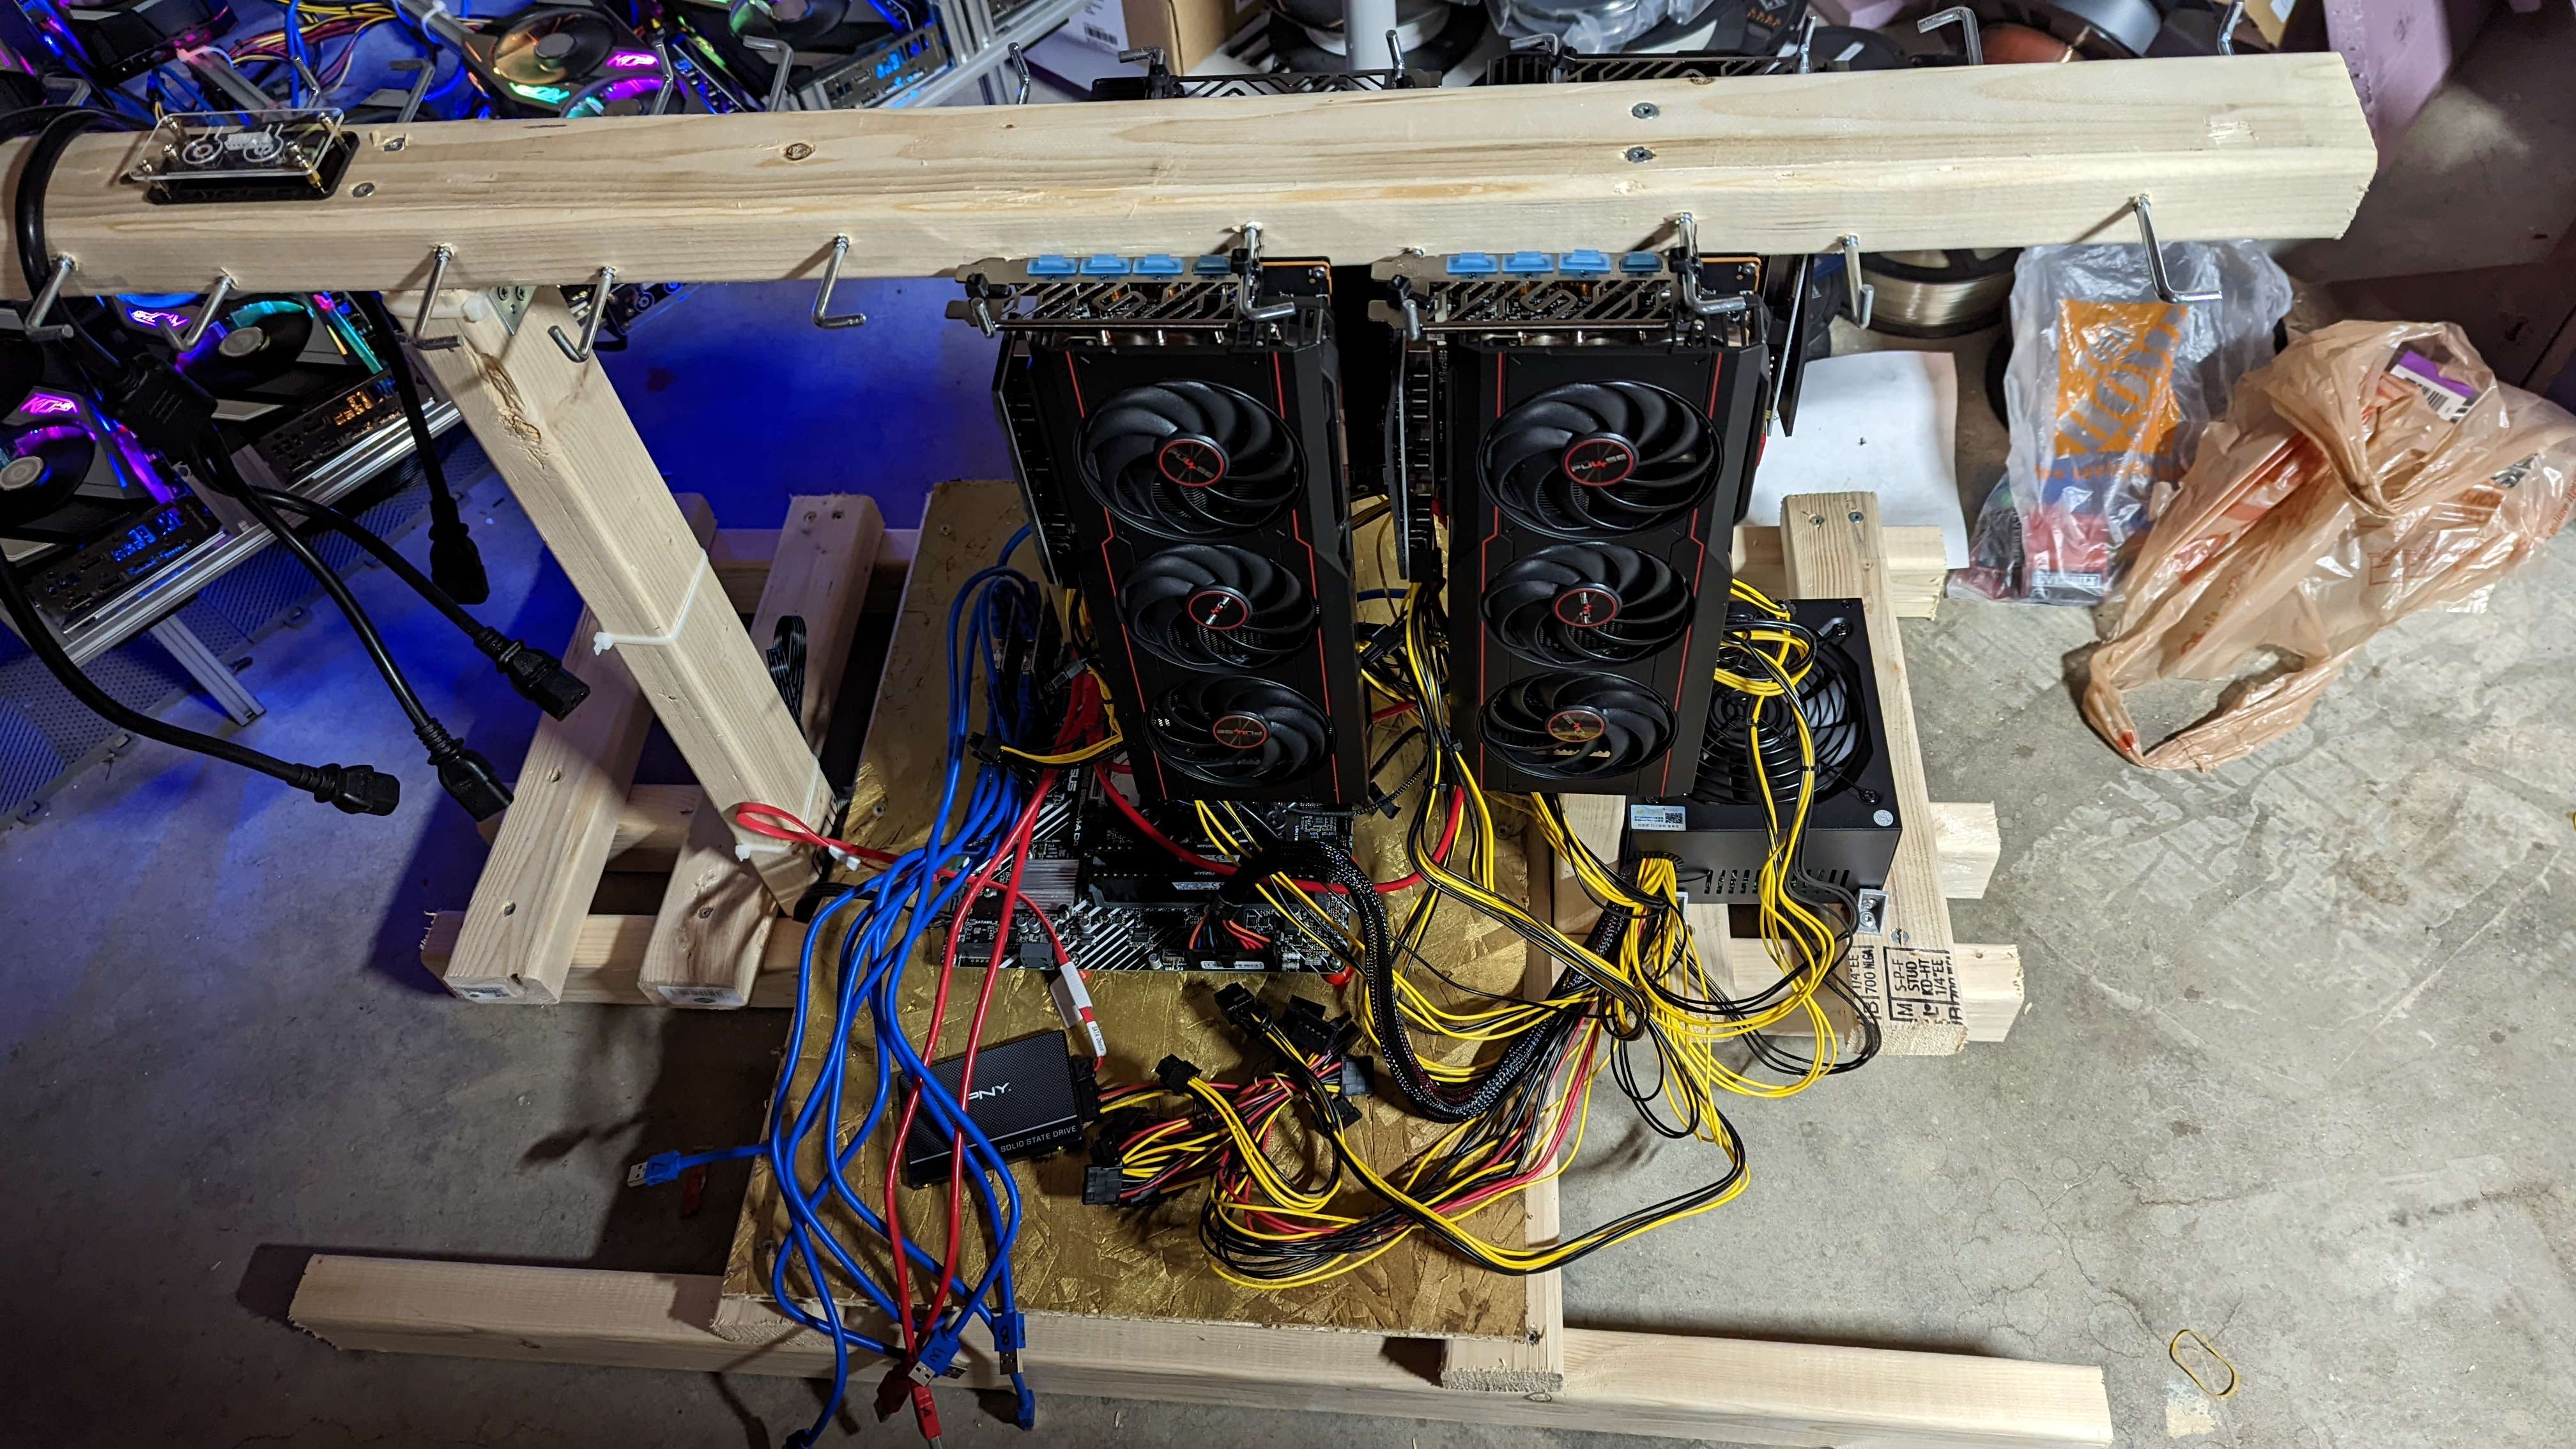
Behold, the “fire pit”!
...as I have decided to call it!

Image

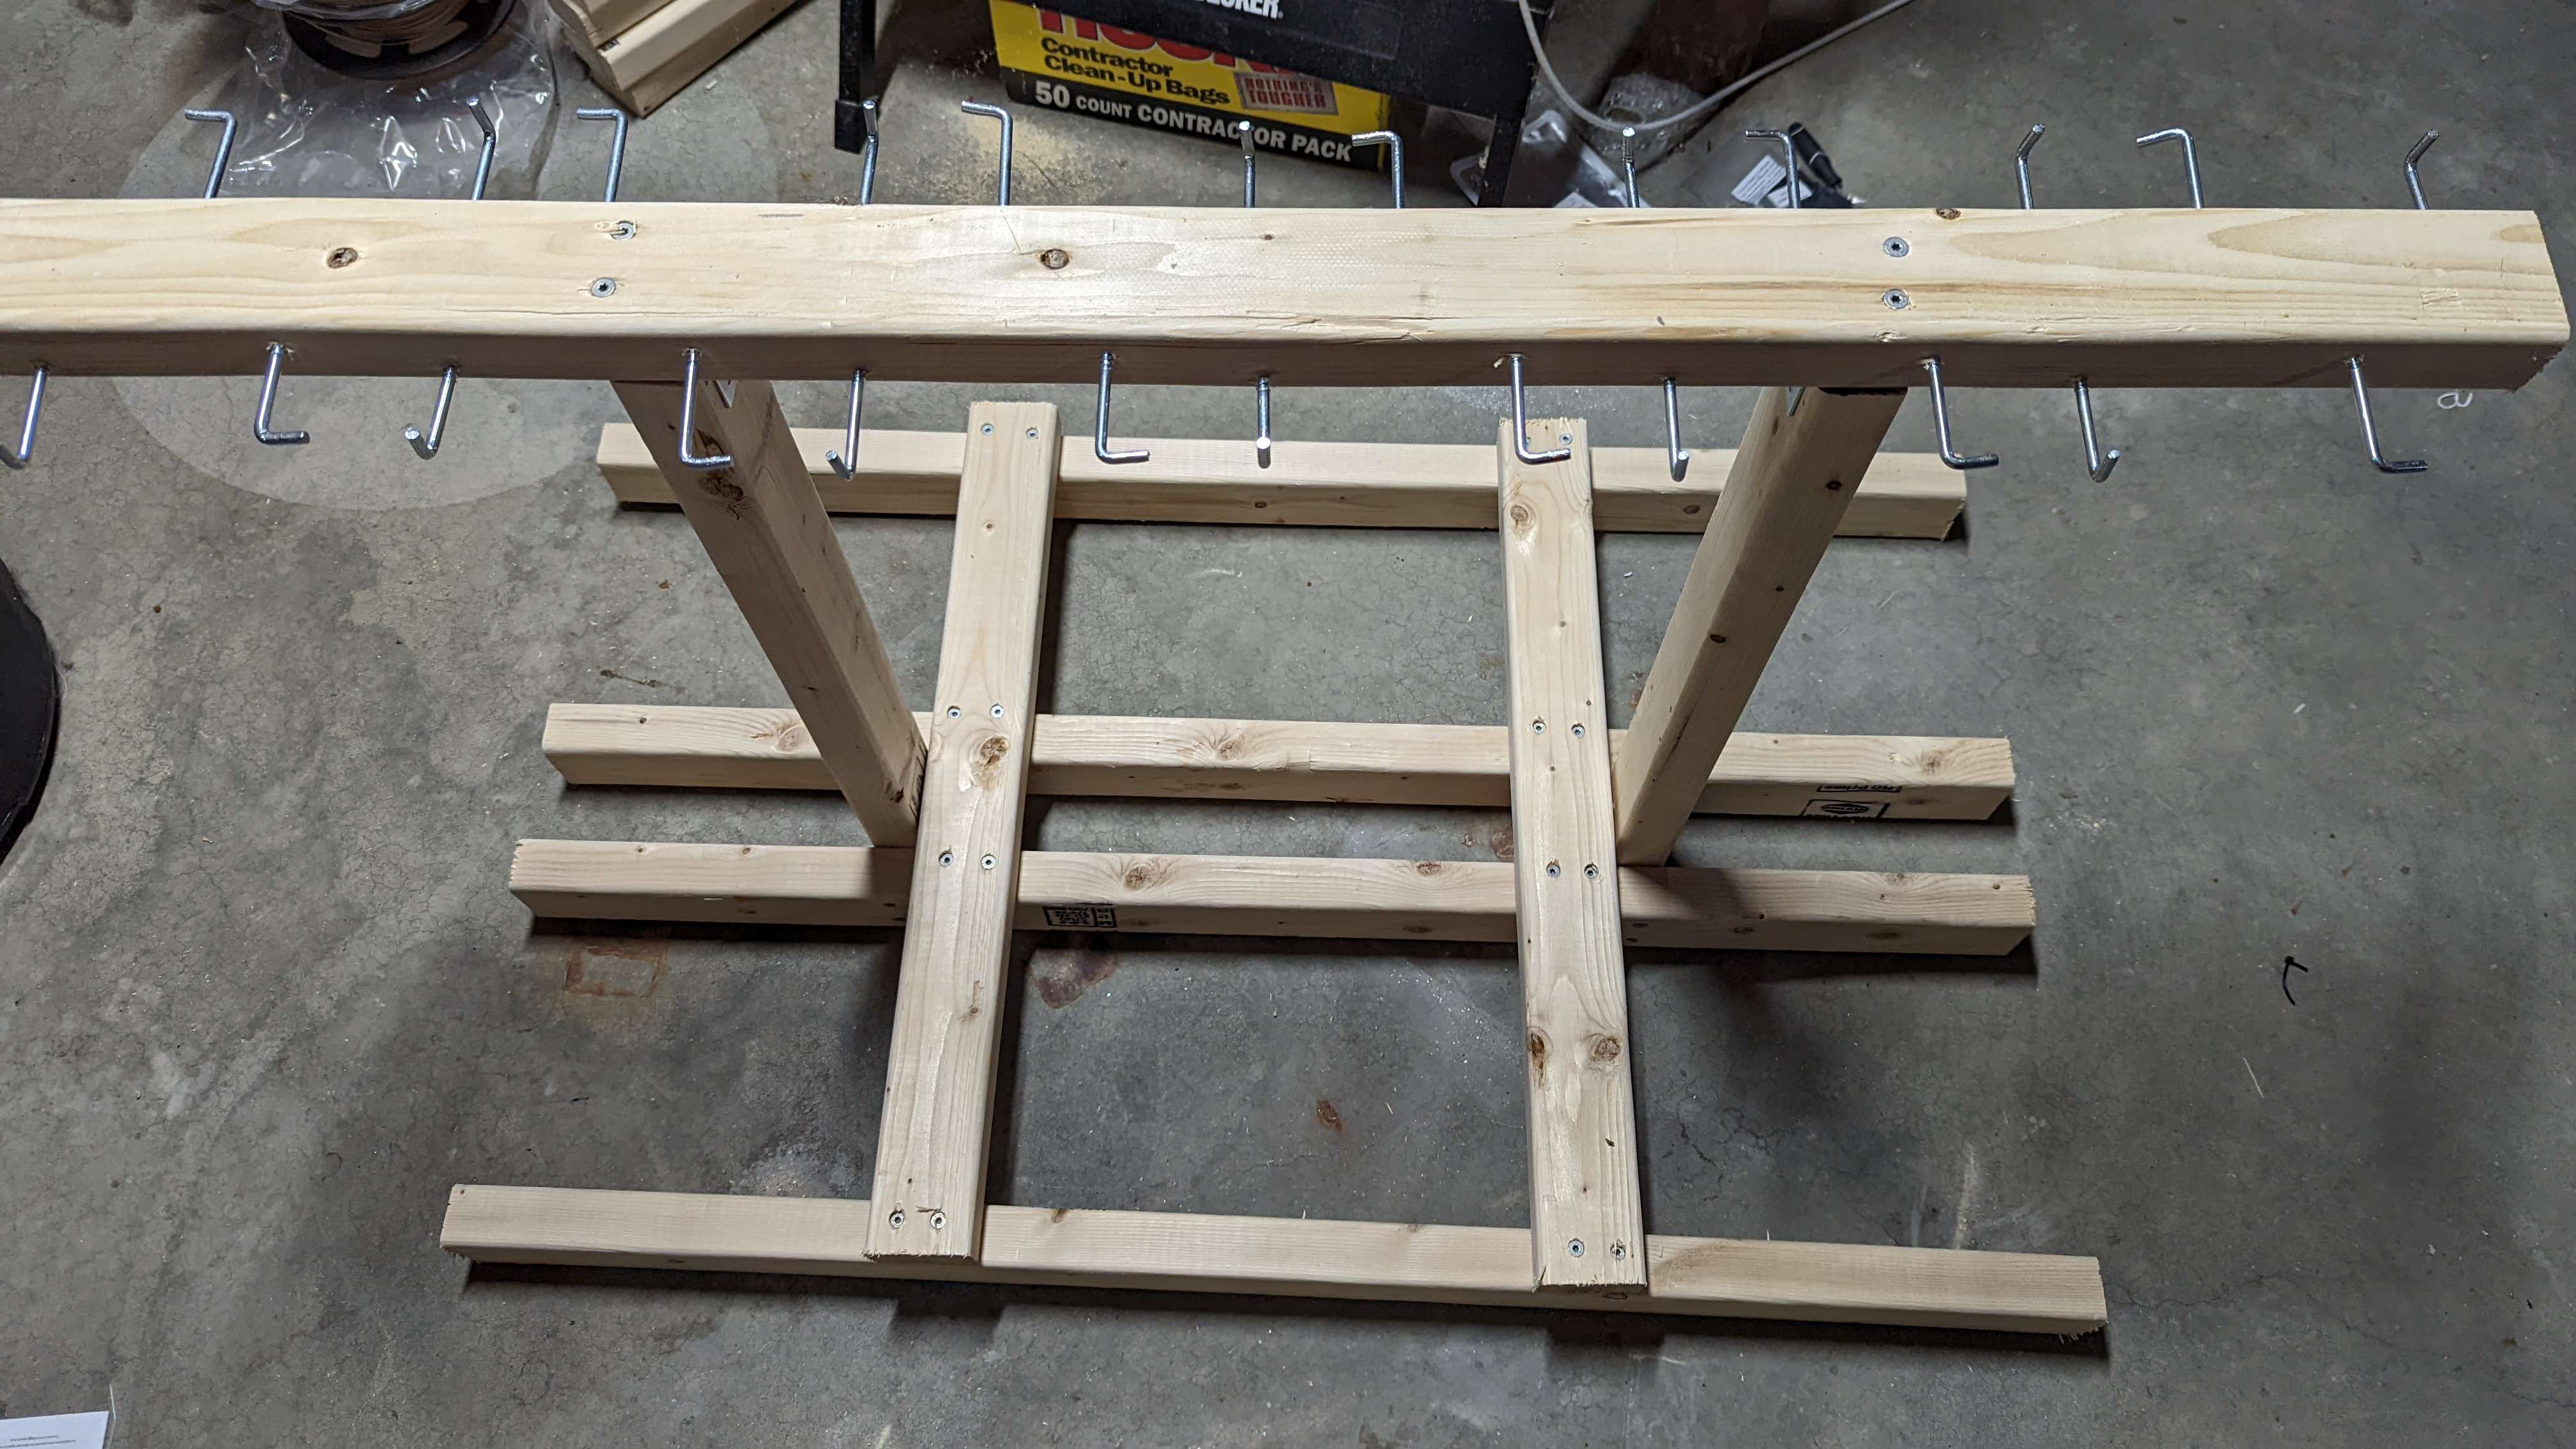
This thing is ridiculously huge at 39” X 33” X 11” (100cm X 84cm X 28cm). It is made of 2020 aluminum extrusion, so it also weighs a significant amount. But it is pretty rugged.

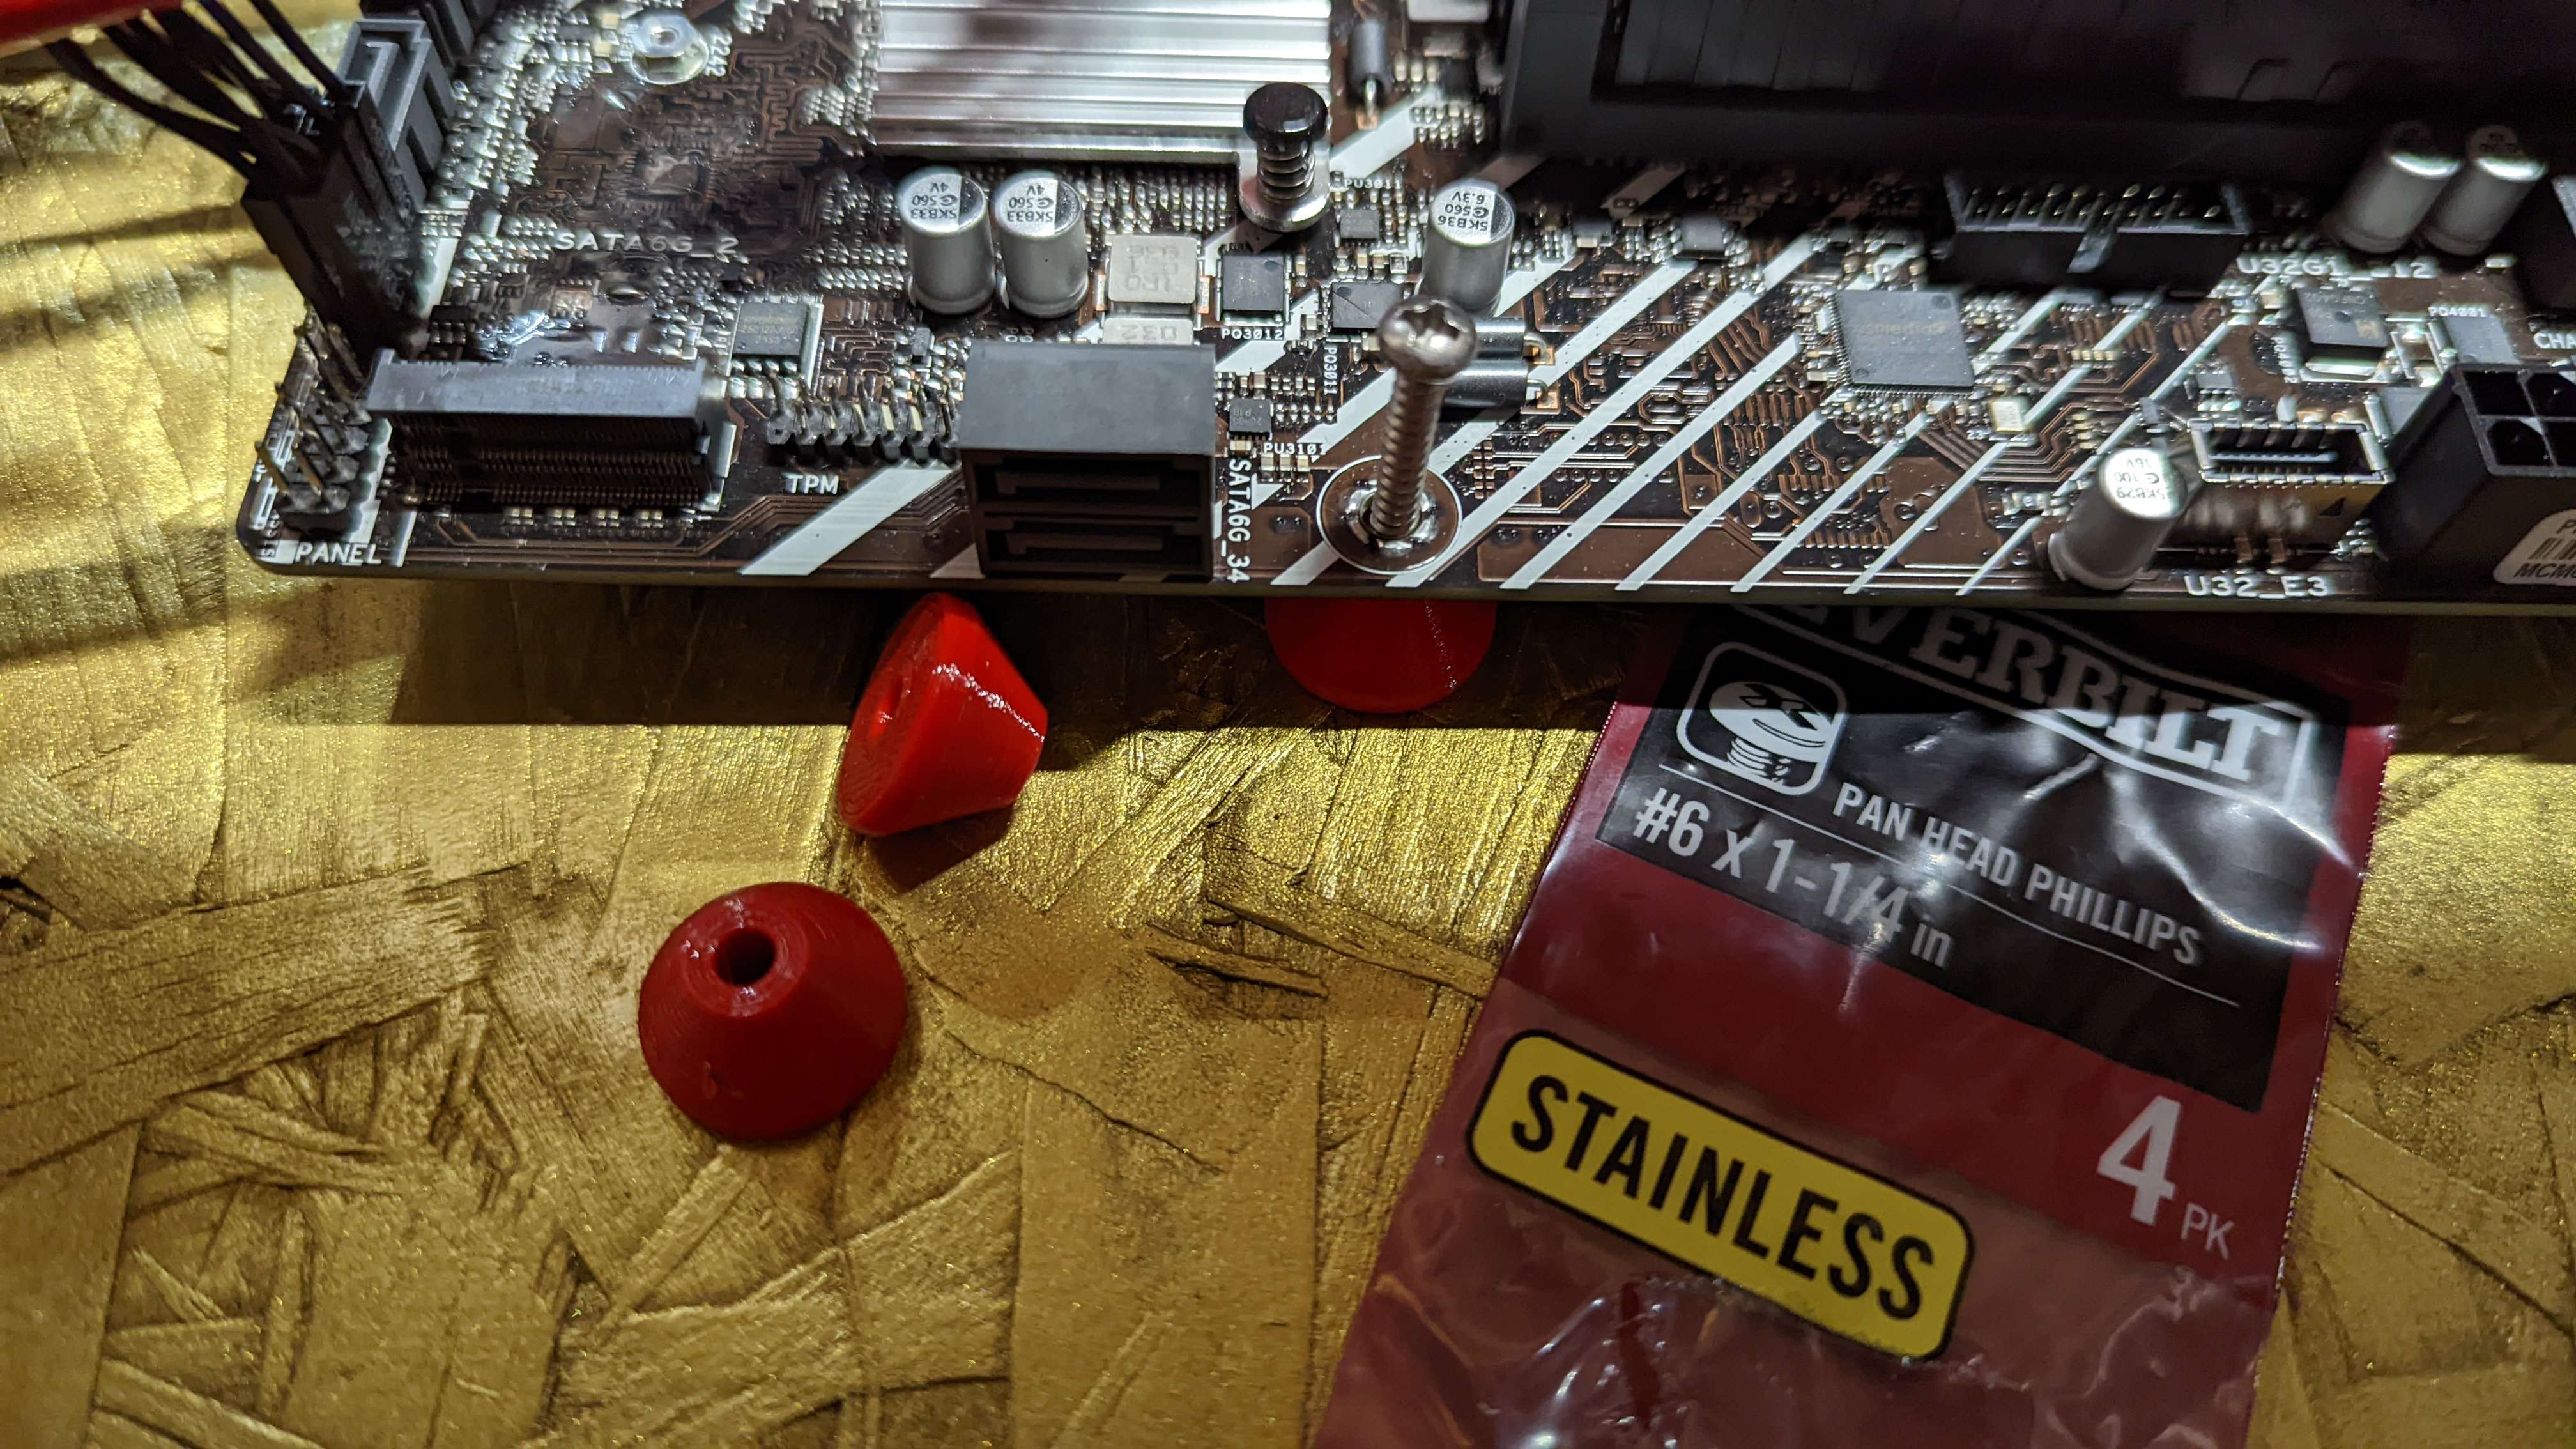
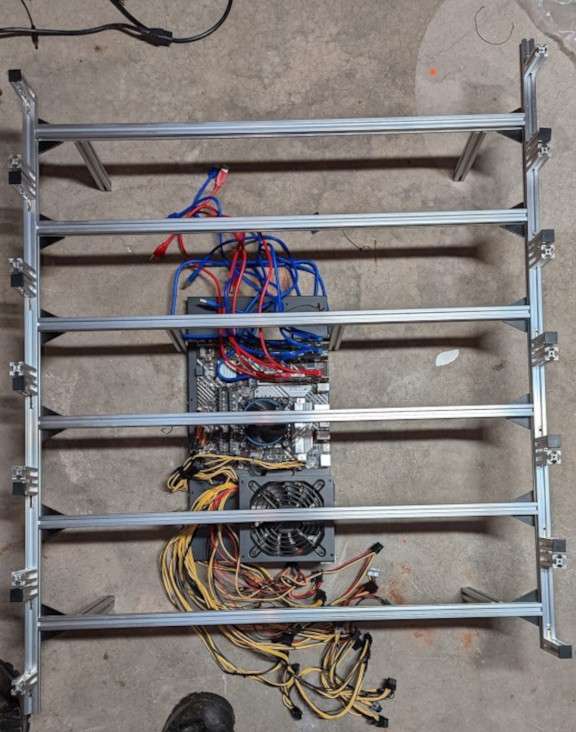
There is a lower level to hold the motherboard tray, which is the first thing I worked on. I wanted to make sure there was room for a second PSU to handle the additional GPUs I will (eventually) be adding. I also wanted the space to make sure the fans from the PSU and CPU had free airflow as well. So the motherboard was placed “centrally” under the cards, hence it on a lower level.

Image

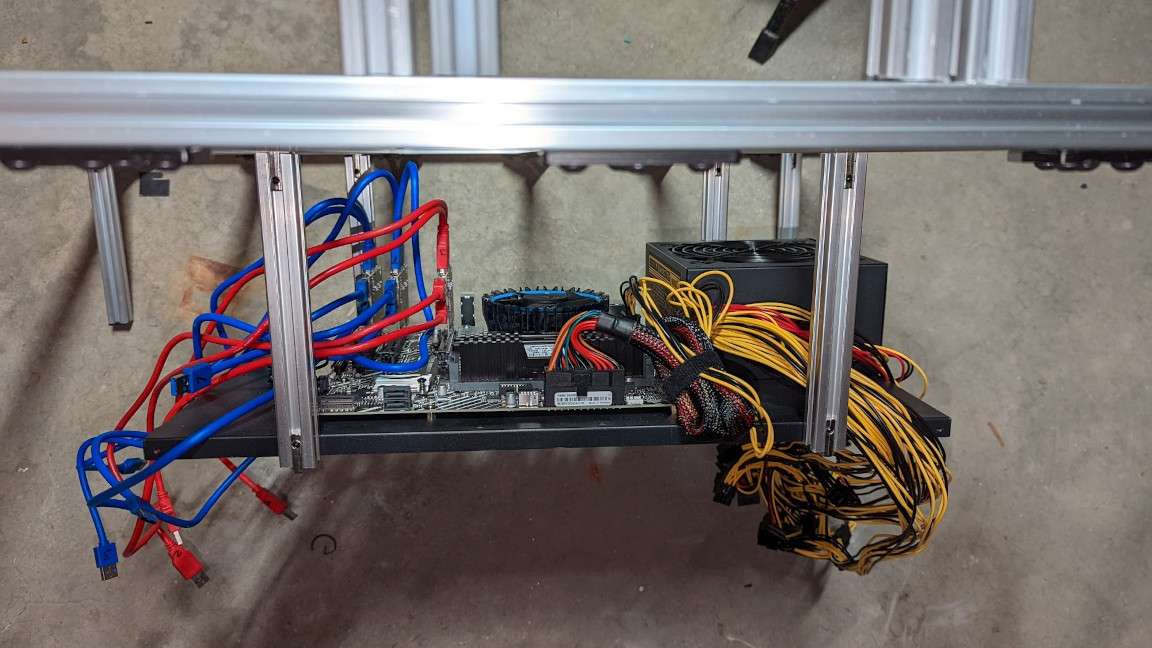
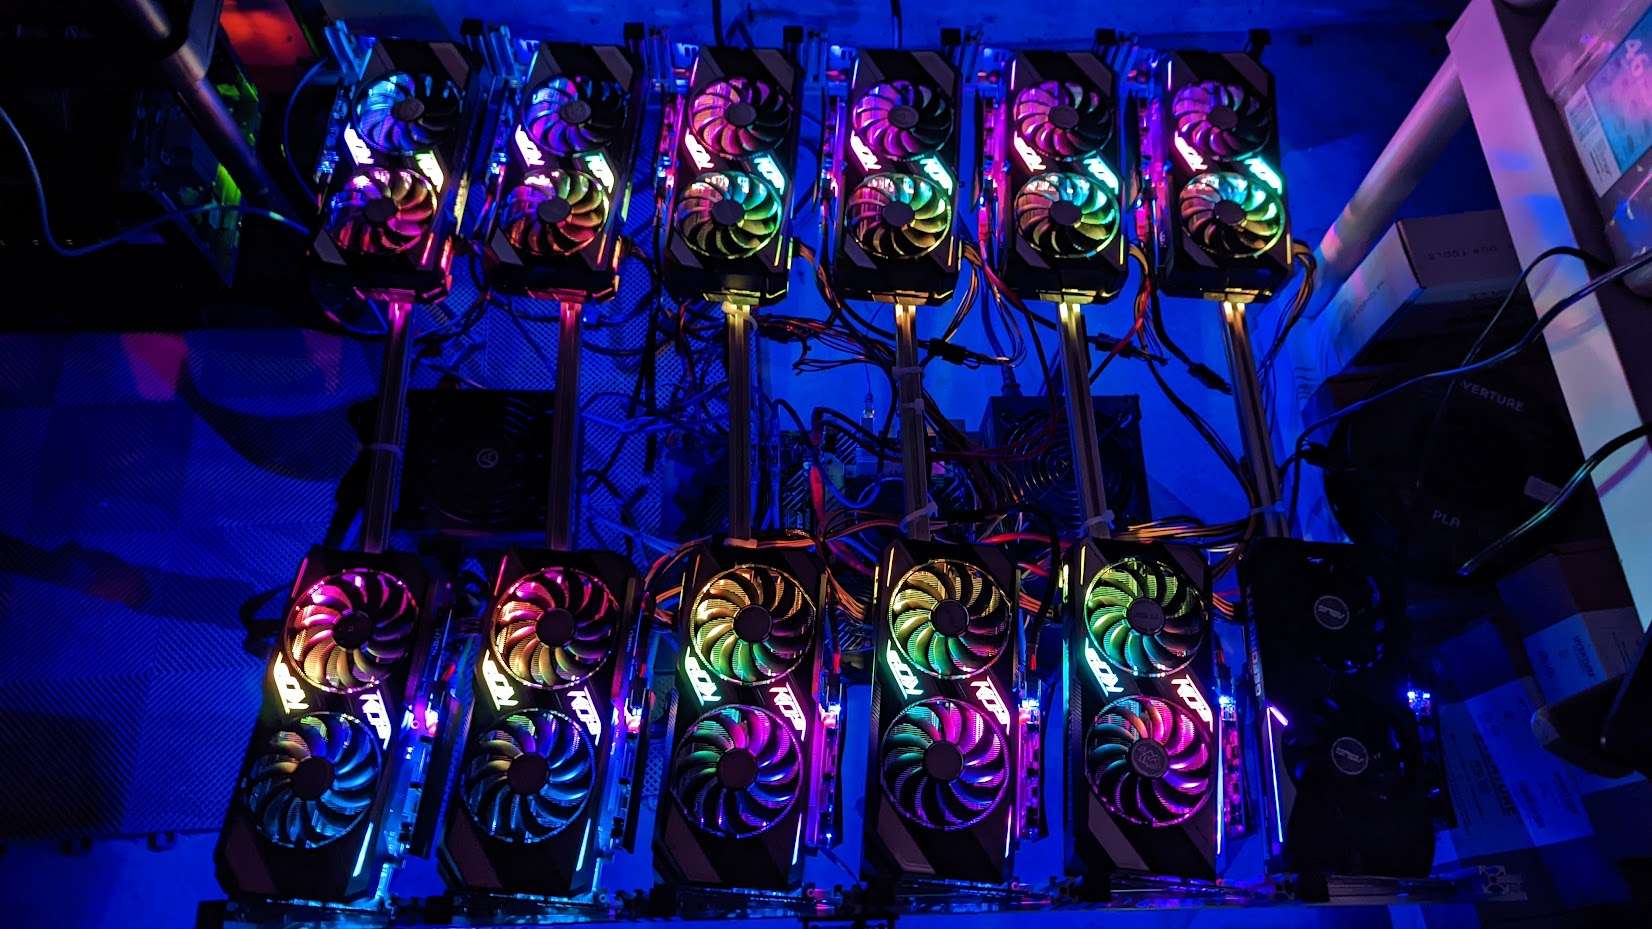
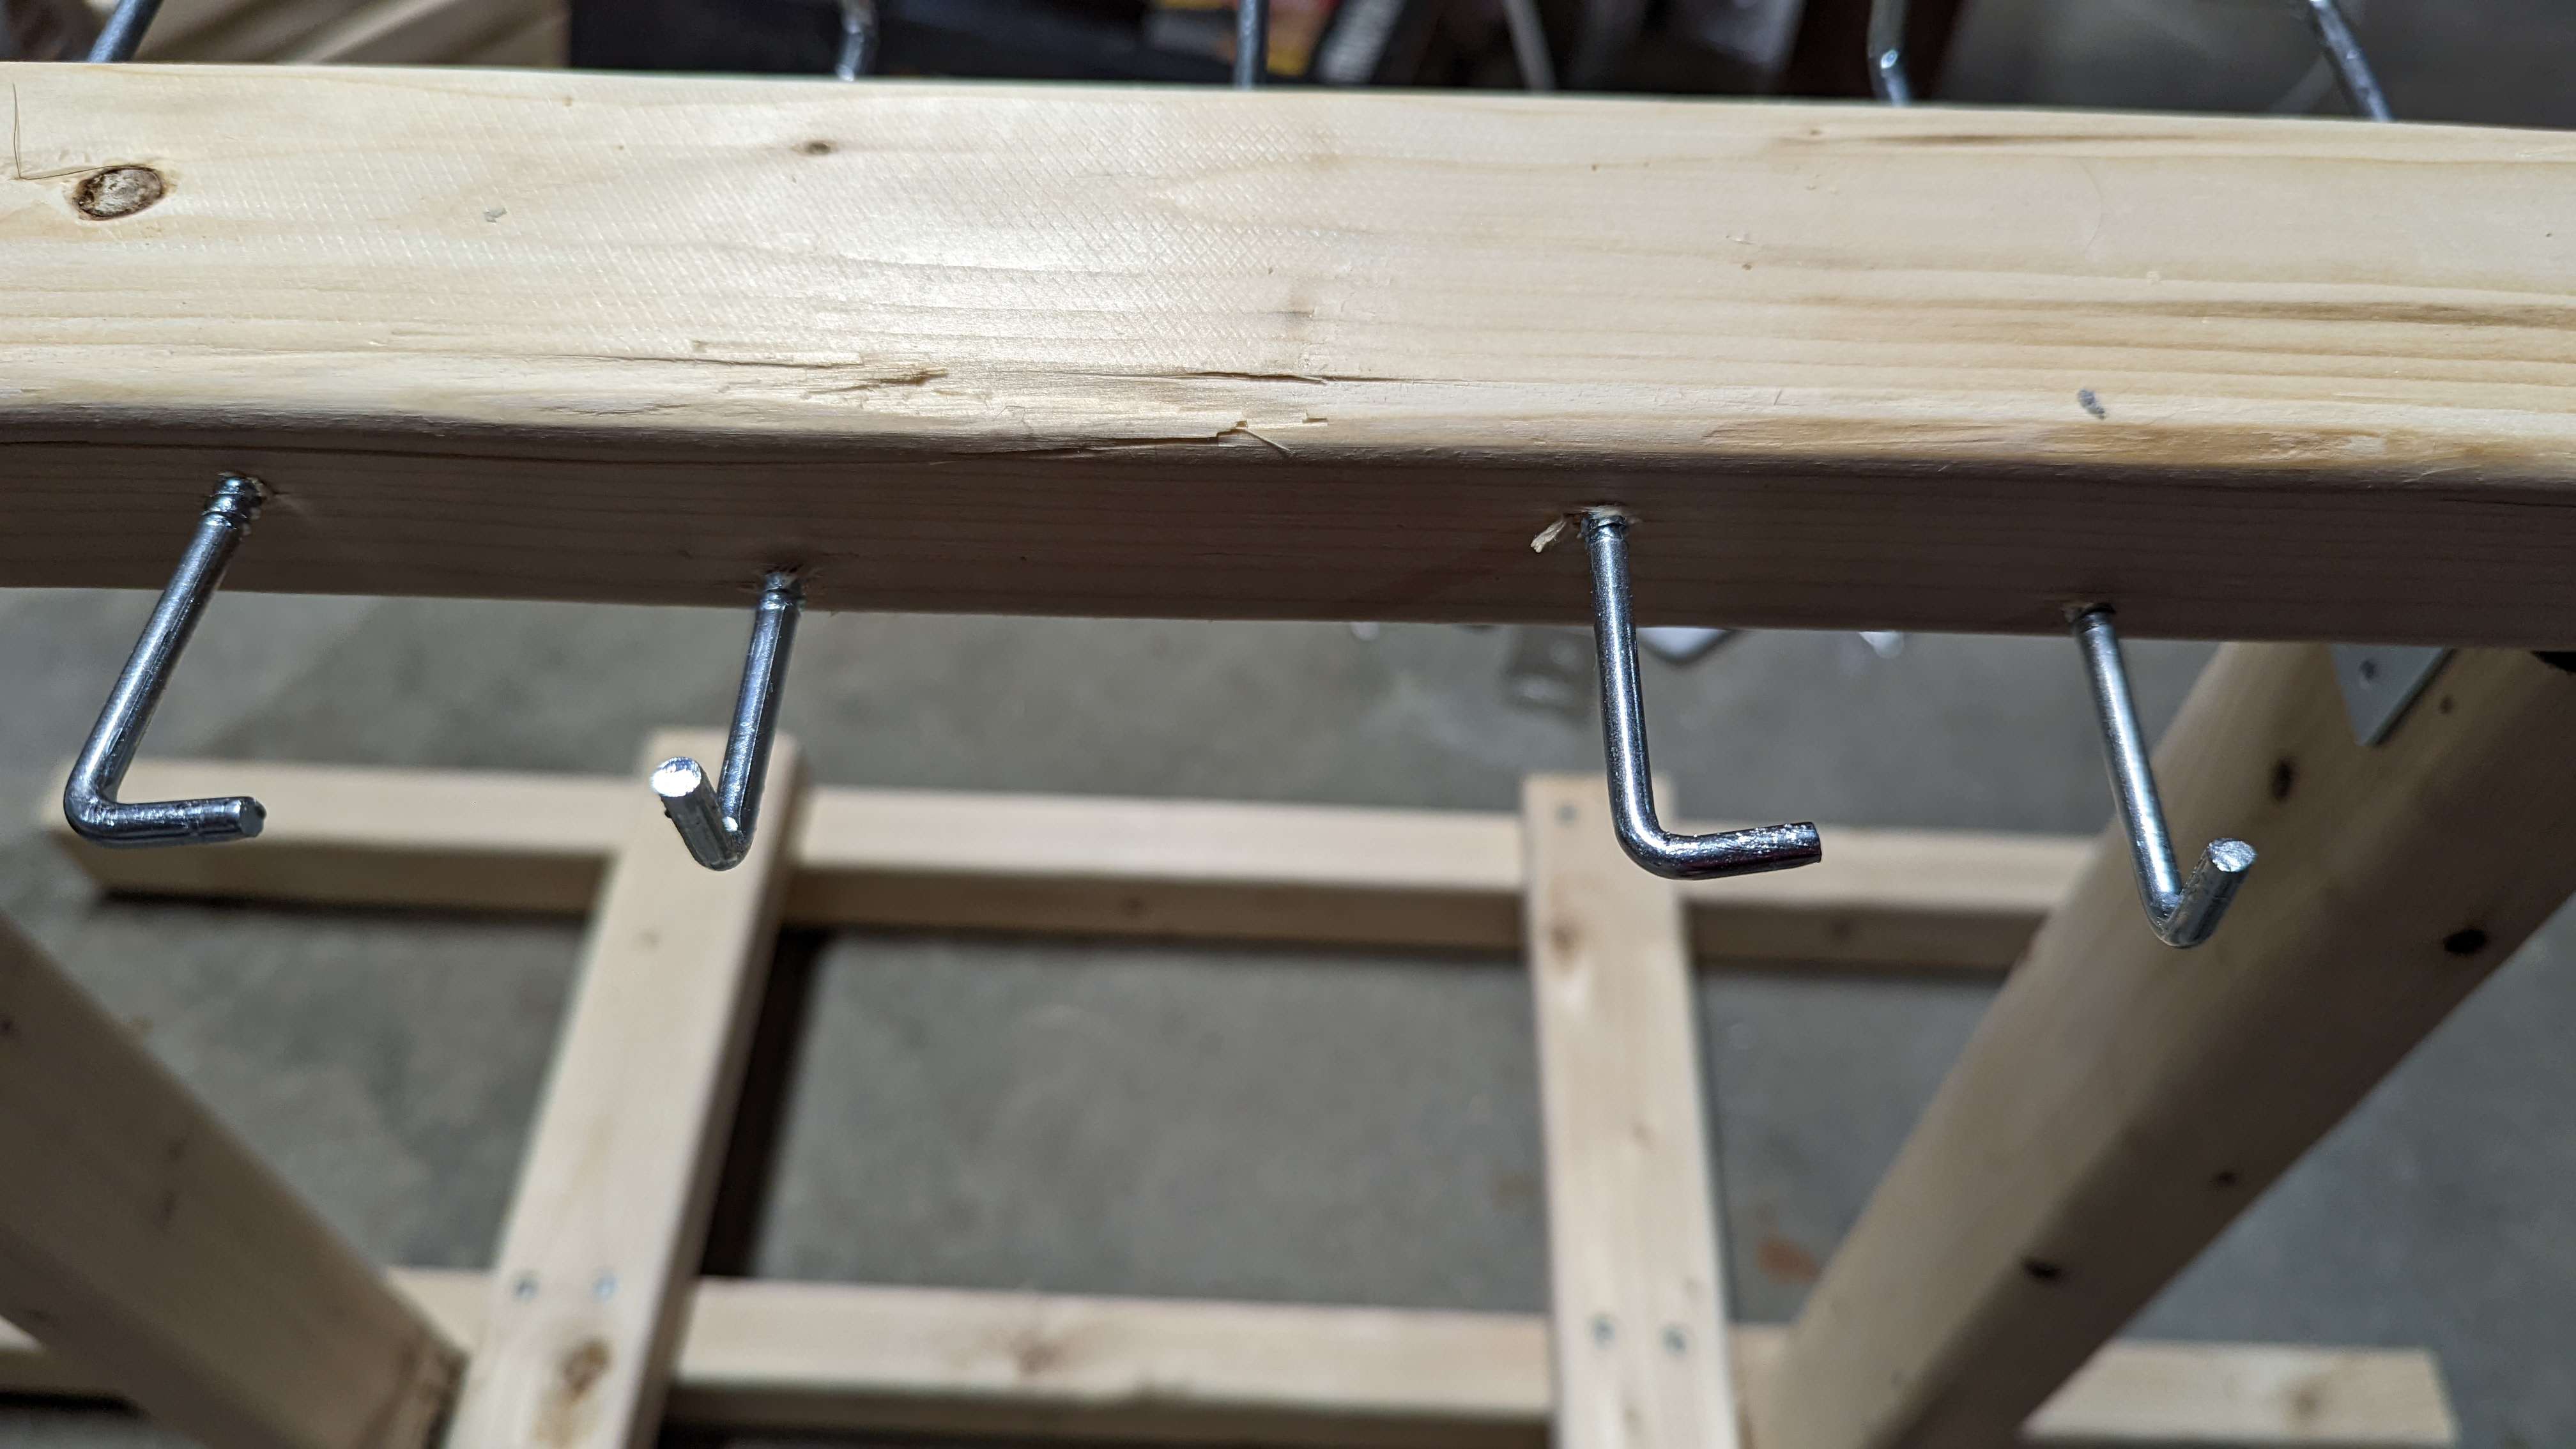
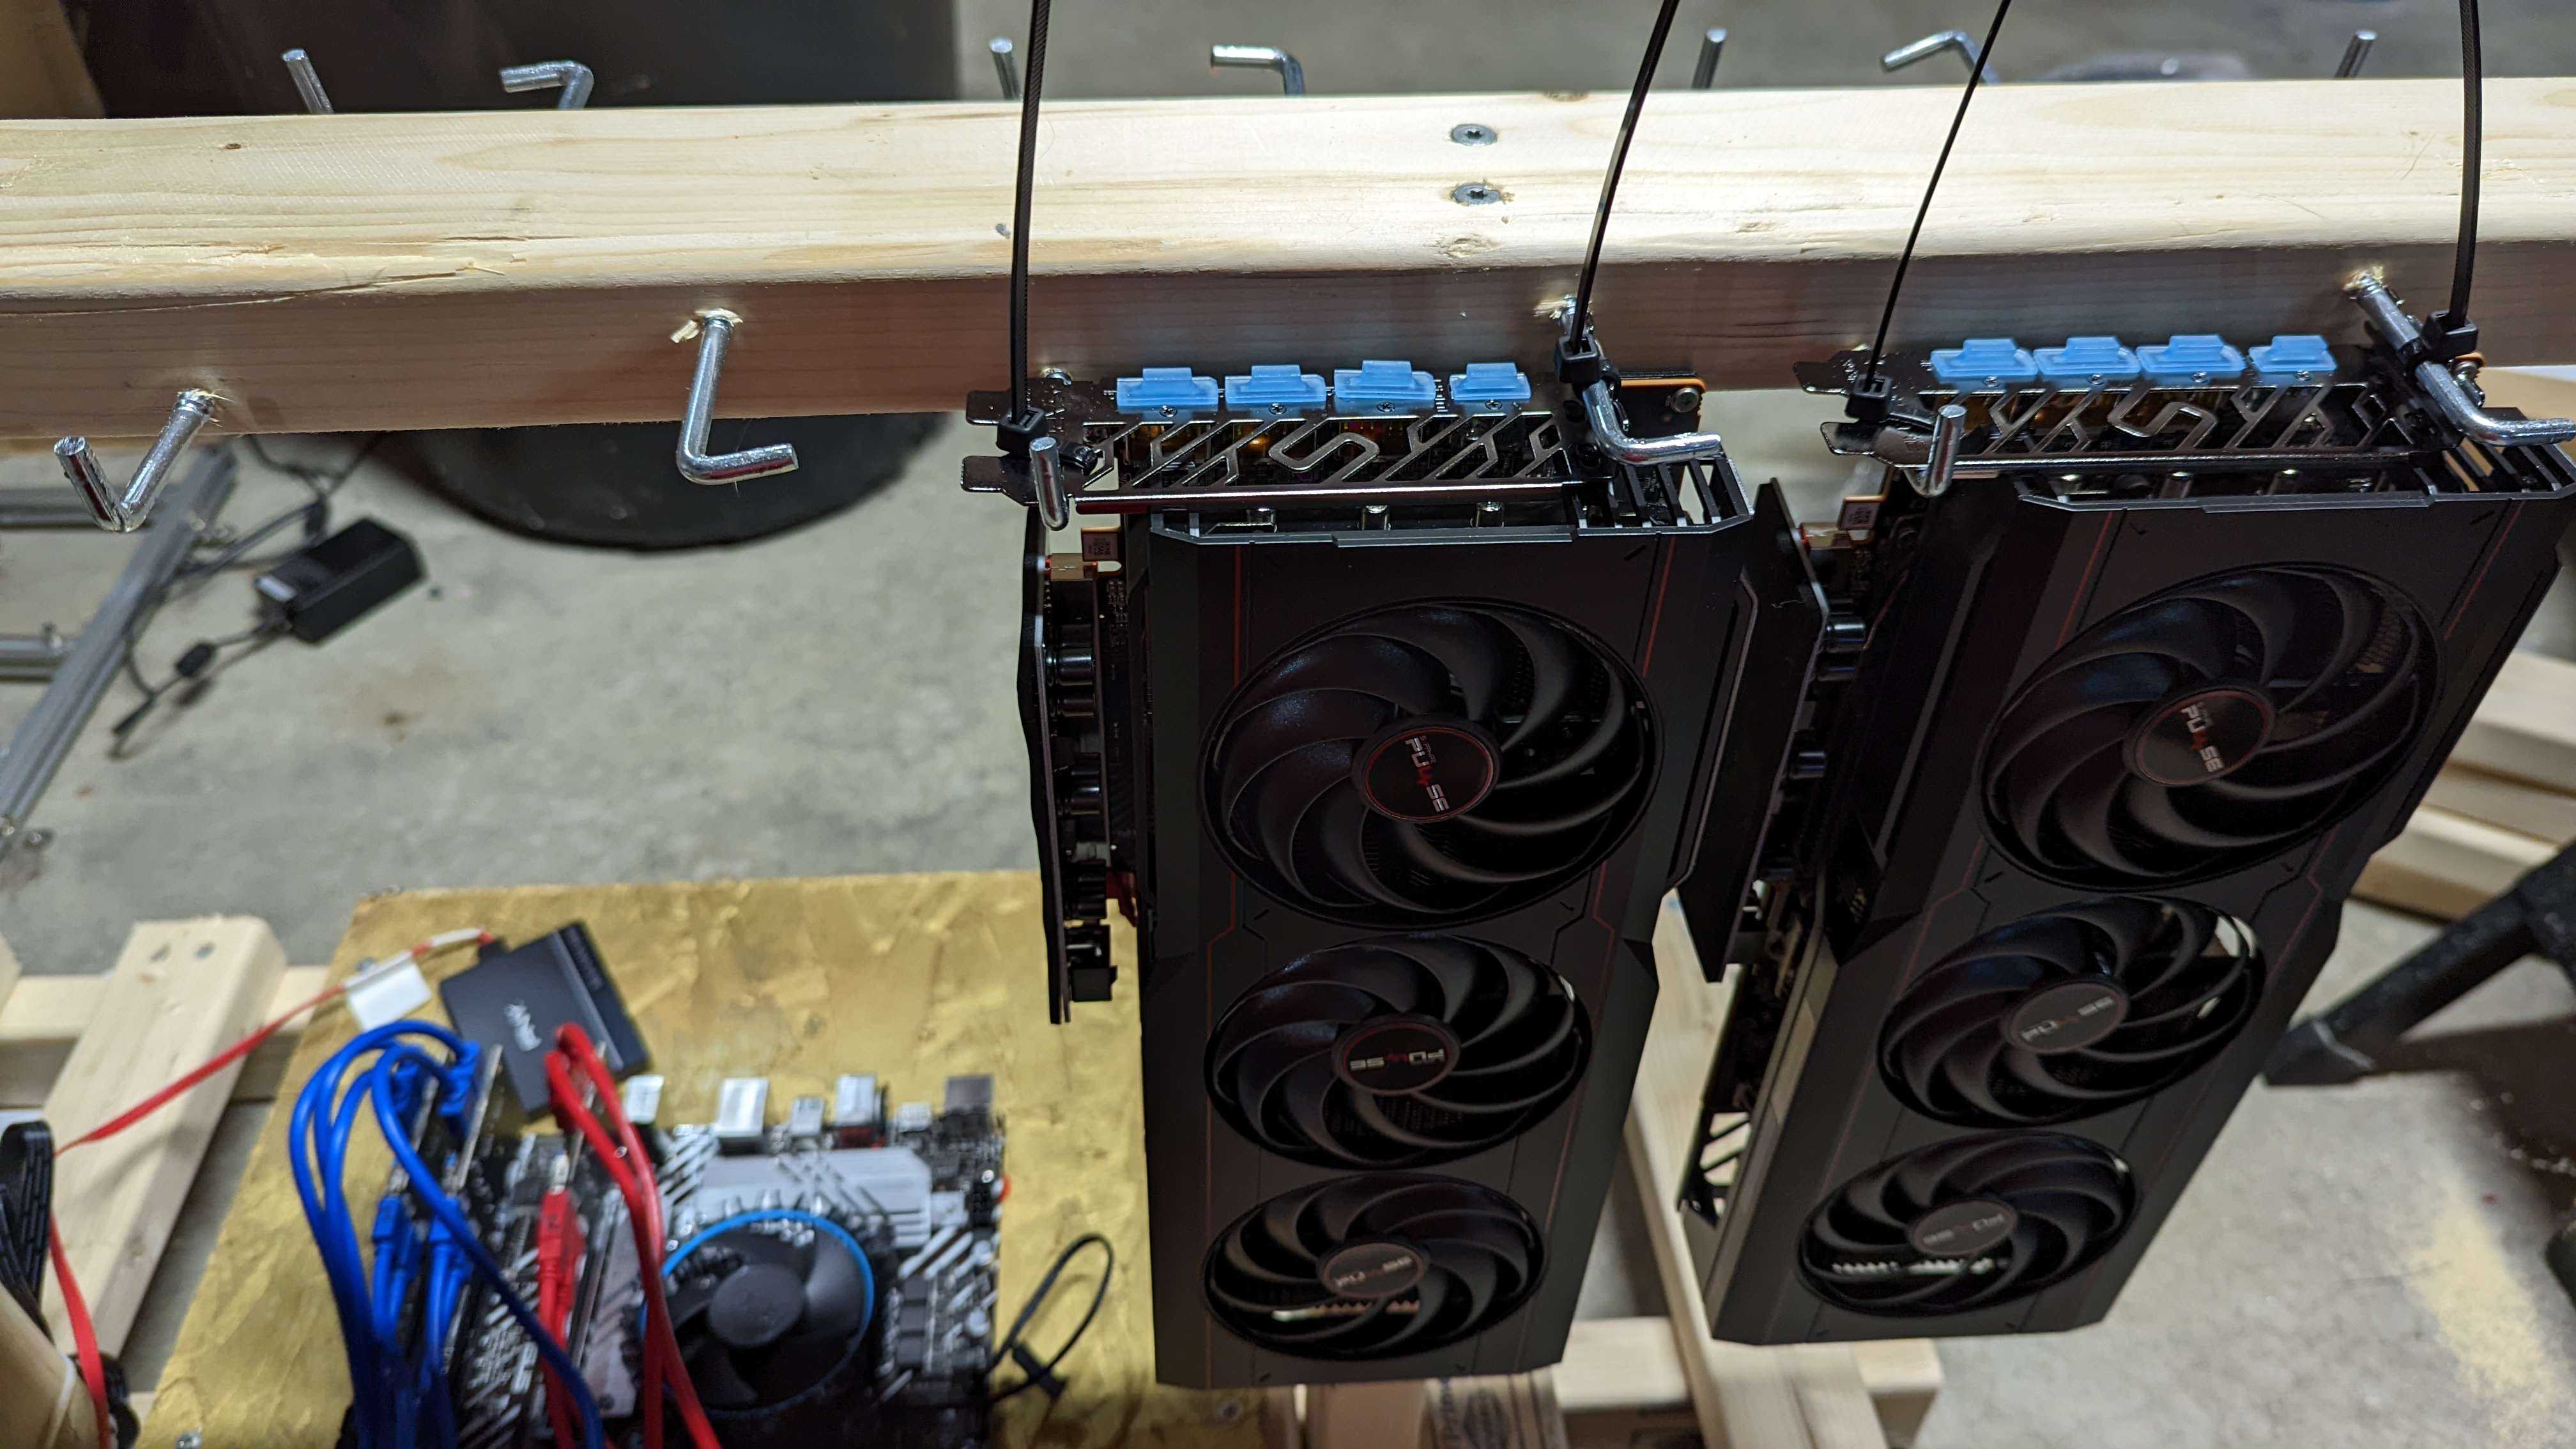
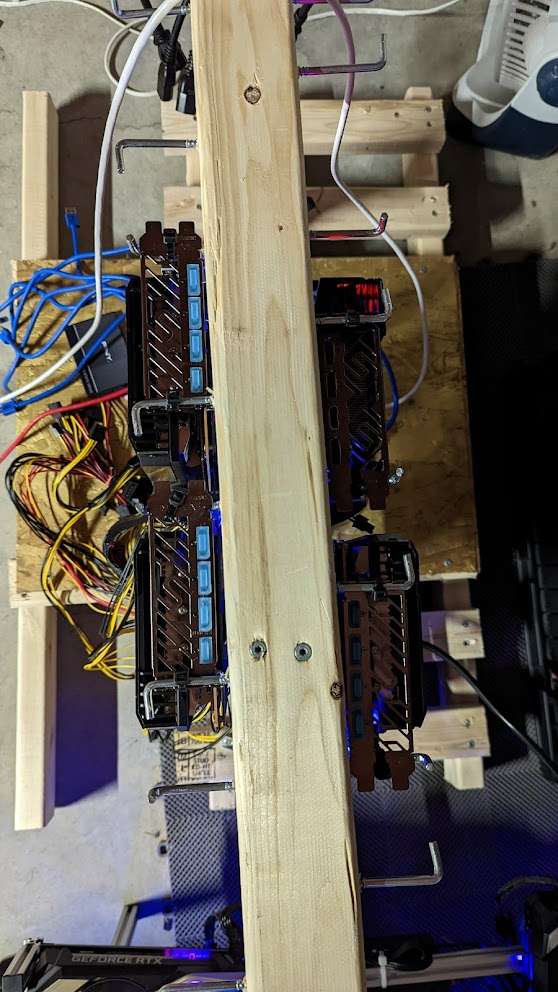
Now the GPUs are going to lay flat on each of the cross beams. This means the fans are pointing straight up, where heat apparently likes to go normally. This allows the stock fans to breath naturally. As a side benefit, by laying the backs on the 2020 aluminum it acts as a heat sink for the back of the cards, drawing heat away from the backs.

Image

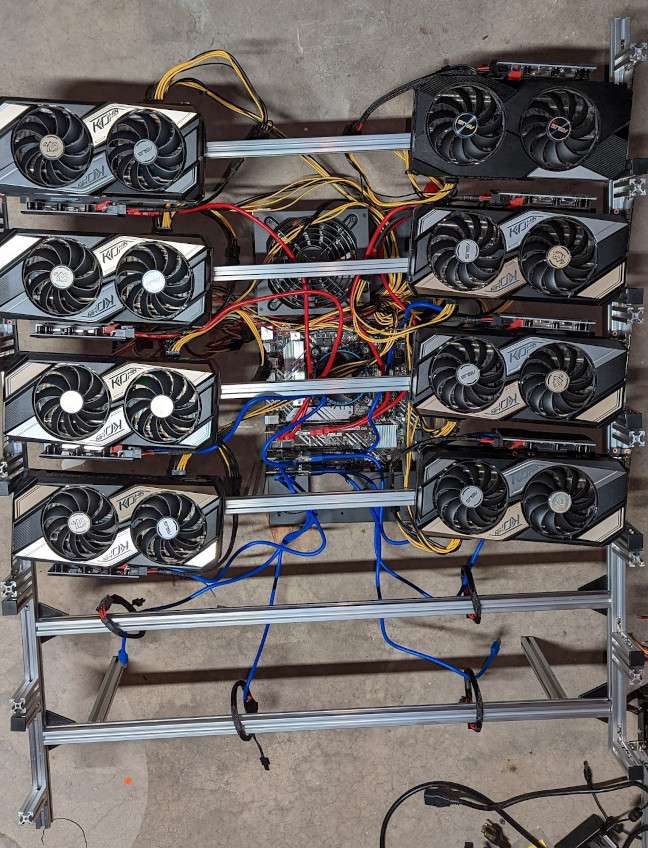
You can see at the end is space for 4 more cards, yet to be purchased, but nice to have the room.

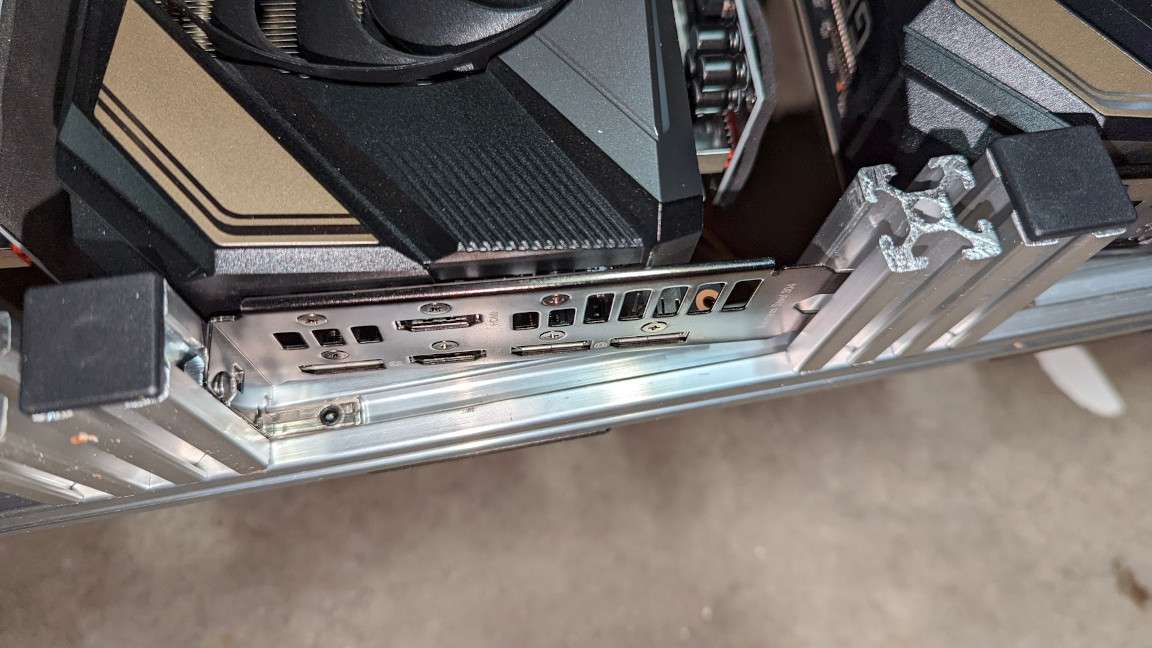
Each card is held in by the bracket, I just used two stubs of 2020 to hold them in. Worked really well to hold them in place.

Image

Before finishing I had all the wires professionally inspected, this is very important!
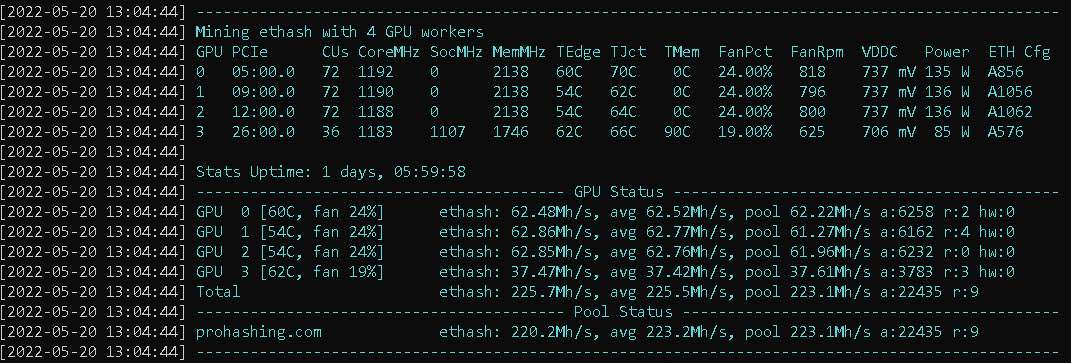
Image

The results...

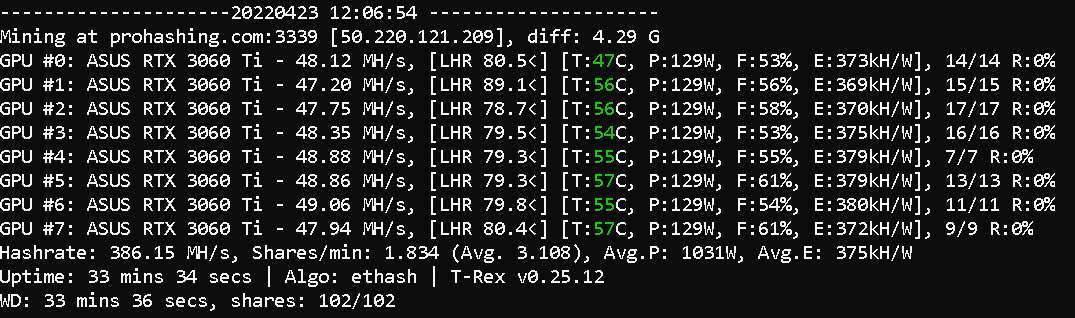
So, now the important part, the results were pretty amazing. Using exactly the same overclocking, every card is now at or under 55 degrees, and all the fans are running at 53% to 55%. I may play with some higher clock speeds later now they are running so much cooler.

Image

I should also mention that the new configuration uses none of the fans that were on top or at the front of the old rig, so I am saving quite a bit of power on removing the 10 fans that I had, and still running cooler than before! Plus the fans on the cards themselves are not running as hard, so the efficiency of the cards has also improved. Originally they were averaging 400 to 405 KH/w, where as now I am up to 420 to 425w, about 5% per card with no overclocking changes.

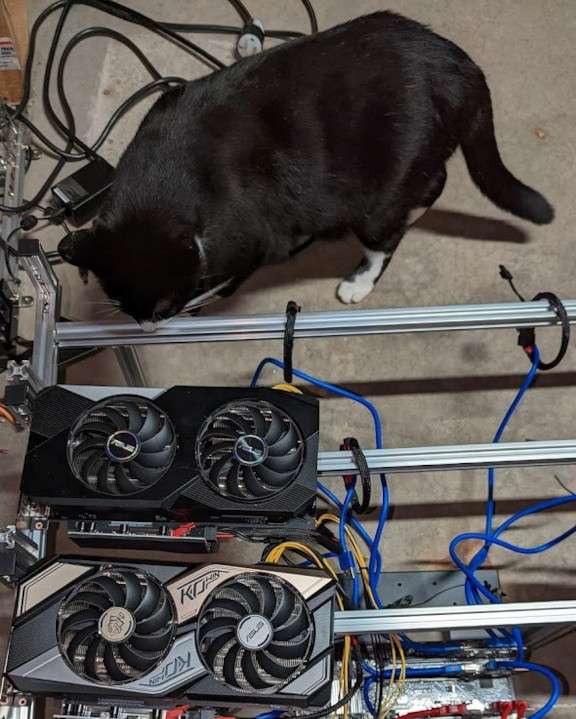
Oh, and the reason for calling it the fire pit… it glows and gives off (some) heat… she is a pretty one!

Image

My final summary….

I had a good time building this thing. I probably could have made it more compact, but I like the spacing, and it gives me the option to use longer GPUs if I want in the future.

I am lucky enough that I have space in the corner of my basement to keep it, without it getting into too much of my way.

I spent $217 on the materials for the frame, I could probably have picked some cheaper parts, but I tend to overengineer. This is quite a bit more than some of the cheap open frames, but they are quite fragile, where this thing is a tank. It is however cheaper than the server case style, though that comes with a special motherboard.

In full disclosure I did also spend an additional $126 on “unnecessary” items, like end caps, extra cables, and things to be ready for adding the next PSU. But I didn’t include them in the $217 above because it was not part of the like-for-like replacement.

Now I know many people will say that running in the low and sub 60s I probably didn’t need to do all this, and they are probably right, Ceteris Paribus. However, I justify in two ways.

First, there was no way I was going to get the four new GPUs on my old rig, so I needed to do something. Building a second rig was possibly an option, but then your wasting energy with a second MB setup, when what I had already had capacity that was unused.

Second, with Ethash (eventually) moving away from POW, I am going to have to find other algos to mine. If they are GPU intensive then that could require higher power, clocks, and therefor more heat generation. My old rig would have started to heat up in that situation. Also if I try to do some dual mining on these, to use some of the same underutilized resources, I may need that extra heat dissipation sooner rather than later.

So in both ways I feel this new rig future proofs me, so for me, in my situation, I feel it was a good choice…. Excessive.. but good.

What’s next?

As I mentioned, with this cooler running, I may try to tweak some overclocking to see if I can get more out of it without dropping efficiency.

I am also planning on switching to Linux so I can try dual mining. Since these are 8GB cards I can’t do a lot of the dual mining on windows which require a minimum of 10GB cards.

And as I mentioned, try getting 4 more cards to fully populate it. With GPU costs coming down, now might be a good time to see what I can get.
User avatar
TechElucidation
Posts: 44
Joined: Fri Mar 18, 2022 2:01 pm

Re: Adventures in frame making

Post by TechElucidation » Sat Apr 23, 2022 12:40 pm

Quick follow up.

After 12 hours, everything was still totally stable, temps still topping out at 55, with most cards lower, efficiency still at the high 423 KH/W.

Image

Wanting to play with it I decided to see if I could push the overclocking more. The cards were averaging 46MH/s, for an average total that hovered around 365MH/s.

I was able to push my memory up to +1300 before it became questionable. Before the new frame if I went over +1100 it would crash, so the lower temps are helping out quite a bit. However I wasn't seeing much benefit from this, and had to increase the power limit from 55% (110w) to 65% (130w) to give it the power to utilize the increased clocks, and to allow some higher core clocks.

It did improve the overall hash rate, with each card going up to an average of 48MH/s (~+4%) with the whole rig averaging 385 MH/s. However that boost came with a increase of power from a total of 880W to 1040W (~+18%), and efficiency dropping from the 420MH/w to 375MH/s, about an 11% drop in efficiency.

Image

Temps continued to stay stable, with the upper limit going to 57, but still nothing serious. I was very glad about that result, because as I said, my next round of playing is going to be trying to dual mine which is going to put a bigger load on it. Just ethash alone is not pushing it enough right now.

On windows or ethash mining only, I will be going back to my original configuration, with the total hash rate of 365MH/s, the drop in efficiency is not worth it. The profit (revenue - expense) shows I am better off with the lower rate.

I am glad I was able to hit that 48MH/s, as I had seen others say they had gotten their 3060 TI's to that level, but rarely talked about the cost of what it took to get that rate.

Another comment I got from a friend was that repadding it might have gotten similar drops. I disagree, first off because I think some people saying they dropped 20 degrees without changing anything else are inflating numbers. Or what I also suspect is that they are cleaning their cards when they do the repadding, and that is also significantly helping.

However, moving heat from the chips to the heat sink can only help if the heat sink can then move the heat elsewhere as well. If your card can't breath and push that heat away (which was my issue with the original dense setup) then all the pads, paste, or copper isn't going to help. Its like expanding a 2 lane highway to a 4 lane, but still trying to get everybody into the same driveway - more people (or heat) going nowhere.

If I see my heat sneak up in the future, then I may consider replacing the pads, or possibly trying out some of the copper plates from https://www.coolmygpu.com/

But buck for buck, comparing the cost of building my frame compared to the cost of pads or plates (and the risk involved) I prefer my frame.
User avatar
Sarah Manter
Posts: 639
Joined: Fri Aug 13, 2021 11:15 am
Contact:

Re: Adventures in frame making

Post by Sarah Manter » Tue May 03, 2022 7:47 am

Thanks for posting! Super creative and educational (And pretty). Your inspector is looking quite sharp as well, I might add.
User avatar
TechElucidation
Posts: 44
Joined: Fri Mar 18, 2022 2:01 pm

Re: Adventures in frame making

Post by TechElucidation » Sat May 07, 2022 1:14 am

Well, two weeks after finishing the FirePit frame I finally decided to take the time to finish it up by throwing the last few "logs" on the fire.

And here are one dozen ASUS 3060 TI's in the fire pit!

Image

I had to mount the second PSU over on the left there to power the additional GPUs, also had to replace the NVME SSD with a SATA SSD to free up the last PCI-E lane to get all 12 running - needless to say, finishing up was a little more work than I thought it was going to be at first.

The layout continues to be fantastic at keeping the heat down. Fans continue to be around 55%, temps mid 50's and lower, and able to get maintain a very stable 420Kh/W or better efficiency.

Image

Thinking about my next move, I have a couple of AMD cards that I had picked up along the way. They do not work with T-Rex (which is giving me the best LHR unlock) so I decided to dedicate the FirePit to NVidia with T-Rex. So I am thinking of going old school when people made their own frames and doing a "RedWood" frame with the AMD cards.
User avatar
Sarah Manter
Posts: 639
Joined: Fri Aug 13, 2021 11:15 am
Contact:

Re: Adventures in frame making

Post by Sarah Manter » Sat May 07, 2022 9:44 am

TechElucidation wrote: Sat May 07, 2022 1:14 am Well, two weeks after finishing the FirePit frame I finally decided to take the time to finish it up by throwing the last few "logs" on the fire.

And here are one dozen ASUS 3060 TI's in the fire pit!

Image

I had to mount the second PSU over on the left there to power the additional GPUs, also had to replace the NVME SSD with a SATA SSD to free up the last PCI-E lane to get all 12 running - needless to say, finishing up was a little more work than I thought it was going to be at first.

The layout continues to be fantastic at keeping the heat down. Fans continue to be around 55%, temps mid 50's and lower, and able to get maintain a very stable 420Kh/W or better efficiency.

Image

Thinking about my next move, I have a couple of AMD cards that I had picked up along the way. They do not work with T-Rex (which is giving me the best LHR unlock) so I decided to dedicate the FirePit to NVidia with T-Rex. So I am thinking of going old school when people made their own frames and doing a "RedWood" frame with the AMD cards.
Pretty! Lots of work, but sounds rewarding.
User avatar
TechElucidation
Posts: 44
Joined: Fri Mar 18, 2022 2:01 pm

Re: Adventures in frame making

Post by TechElucidation » Fri May 20, 2022 1:27 pm

So, after the “FirePit” frame (which is still running great) I wanted to make another frame that would hopefully use a little less square footage of my floor space, but still provide good heat dissipation. I also wanted to use wood this time to make things a little simpler to do. I also wanted to try using AMD cards (giving me options post merge) and since they are referred to as “Red” cards being AMD, I am calling this new frame “RedWood”.

I still wanted to focus on unobstructed airflow for the stock fans however, and avoid them blowing directly on a neighboring card or having very little room to expel heat. I also wanted to continue not using additional fans to keep overall power consumption of the rig low. My decision was to make a taller frame, with the fans facing outwards. To keep the size semi-reasonable I did two rows (with the GPUs back to back) over a central frame, and then would hang the cards by the faceplate.

Here is the bare frame. You can see the base is just large enough to provide a stable base; as deep as it is heigh. Then supports to support pillars, with a cross beam that I attached a bunch of L hooks to.

Image

Image

I placed a board in the middle area, and with some 3D printed standoffs I held the motherboard in place, with the PCI riser cables coming out near the center of the structure to reach the hanging cards.

Image

The cards then attached to the L hooks with cable zip ties which keep them in place. I mounted cards in a slightly offset fashion, back to back, with the fans pointing outwards.

Image

Image

Image

Finally I put the PSU on the outside – as I fill the frame I will put a second PSU on the other side, and each will power half of the frame/GPUs.

Image

Wired it all together and got it up and running.

Image

So, the end results…

I used 2x3 wood from Home Depot, and was a lot cheaper than 2x4s, and cheaper than the 20x20 extrusion I used on the FirePit. Being able to quickly put it together with basic tools was nice, as the previous one was a little more fiddly to put together. Was also a lot simpler, just screwing together a bunch of wood, where the 20x20 I ended up with needing t-nuts, angles, etc. to put it together. Overall it is quite a bit lighter as well, and having the more compact footprint, much easier to move around and manage.

From a total heat dissipation perspective this is still worlds better than most traditional mining cases with cards sitting side by side blowing hot air on each other. I did put a 3060 TI on this and connect it to the FirePit motherboard, and while it ran 2 degrees warmer on average over being in the FirePit, it was still very good. The cards that will primarily fill this rig will be Sapphire AMD 6800 XT cards, and the three I have are running at around 55c – 60c edge / 62c-67c junction, with fans running at just 24% - a very respectable result in my opinion. The FirePit sits around 50c, but the fans there are running 55% to 60%. In both setups I let the cards manage their own fan speeds, so figure these are what they like. I also don’t know that the Nvidia cards can run the fans below 50%, I think they just turn off till they are needed again and come back at 50%, where the AMDs seem fine to run at 24%.

A quick caveat here – my overclocking is for overall mining efficiency, and not the highest possible hash rates. I could push these cards harder for a slightly higher hash rate, but then they would be running hotter, using much more power, and the efficiency would drop off. So these temps are based on my current setup, not the hottest I could make them run. Right now I am currently getting 62MH/s using ~130w according to TeamRedMiner (but I have heard that AMD cards do not always report accurately), where my 3060 TIs do 57MH/s for about 115w and so are more efficient. I am still learning AMD cards, and I think there is room to make them more efficient, but that is pretty close right now.

The choice of wood I think was good from a cost and ease of use perspective, and in the hanging form I don’t think it would have made much difference to the heat. However, one thing I have noticed about the FirePit frame with the cards laying on the frame, that it acts a bit like a heat sink on the back of the card, and draws some heat away. The frame itself is warmer after running for some time, so it is moving some heat away. With RedWood however the heat from the back is able to just move up through convection, and while it would hit the beam, there is more than enough gaps in there that it can quickly move out.

I have had some comments about the hanging design, and if it puts too much stress on the card itself. I do not believe it does, at least on the cards I am using the face plate is well attached to the main board, heat sink, and shroud so it holds it pretty well. If you consider how cards are normally placed in a PC, laying like a shelf, which just the face plate and PCIe connector holding it level, I actually think this is less stressful as the weight is held across the entire card, rather than anything floating out in the air. Also there are a lot of people who have hung cards from wire shelves as well, using the same face plates, with no issue. Overall, for me at least, not a concern.

Costs

I already had the 3" screws on hand from making a deck last summer, but for completeness I added a box of 100 here (only used about 30 of them).

L hooks - 24 @ $1.28 = $30.72
3" Screws = $9.47
2' x 2' wood = $2.80
6' X 2x3 - 5 @ $4.98 = $24.90
8" cable ties = $10.86

Total - $78.75

So the cost overall was a lot more reasonable compared to FirePit.

Final verdict

I am very happy with RedWood. It cost a lot less than FirePit, took a lot less parts to put together, and only took me an evening to assemble. It also takes less space, and easier to move around. While you could debate the overall look, I agree FirePit looks a lot nicer and is the one I show my friends who ask about mining, but wouldn't use that setup again if I had to.

If you were looking to build your own functional frame, this would be the design I would recommend

If you wanted to impress a date - FirePit is the way to go.
User avatar
DeafEyeJedi
Posts: 32
Joined: Wed May 25, 2022 11:38 pm
Location: USA

Re: Adventures in frame making

Post by DeafEyeJedi » Thu Sep 15, 2022 10:31 pm

I enjoyed reading through this while I admire your work ethics and eagerness in exploring other options. Thanks for sharing, MacGyver!
Baseball and Mining. HaCkint0sh and Crypto. Magic Lantern never dies! :geek:
kaleb
Posts: 4
Joined: Tue Jan 30, 2024 12:23 pm

Re: Adventures in frame making

Post by kaleb » Sat Feb 17, 2024 6:54 am

I think mining efficiency is not only about power consumption, but also about cooling and airflow. If your GPUs are running too hot, they will degrade faster and lose performance. That’s why I prefer open air rigs with good ventilation and fan control. I also noticed that some GPUs have different heat sink orientations, which can affect the airflow direction and cooling efficiency. For example, the ASUS 3060 TI KO V2 has vertical fins, while the RTX 3080 has horizontal fins. I wonder if this makes any difference in terms of mining efficiency and longevity. What do you think?
gardon
Posts: 7
Joined: Tue May 16, 2023 9:23 am

Re: Adventures in frame making

Post by gardon » Sat Feb 17, 2024 9:30 am

I think mining and buying real estate with crypto https://cryptex.net/blog/en/cryptex/buy ... h-cryptex/ is a smart way to diversify your portfolio and hedge against inflation. Mining allows you to earn more crypto without buying it directly, and real estate is a stable and tangible asset that can appreciate over time. There are also some platforms that make it easy to buy real estate with crypto, such as Metropoly and Pacaso They offer fractional ownership of properties backed by NFTs, which can be traded on their marketplaces. This way, you can access the benefits of real estate without the hassle of managing it yourself. I believe this is the future of real estate investing, and I'm excited to see how it evolves.
kaleb
Posts: 4
Joined: Tue Jan 30, 2024 12:23 pm

Re: Adventures in frame making

Post by kaleb » Wed Feb 21, 2024 6:01 am

Investing in real estate with crypto via platforms like Cryptex, Metropoly, and Pacaso is a strategic move to diversify and hedge against inflation. Mining crypto offers additional earnings, while real estate provides stability and potential appreciation. Platforms facilitating real estate purchases with crypto, backed by NFTs, streamline investment processes. This innovative approach democratizes real estate ownership and eliminates management burdens. It's an exciting evolution in real estate investment, promising broader accessibility and growth potential.
Post Reply